Now that your family is working from home more often, you might be starting to notice some wear and tear on your marble surfaces.
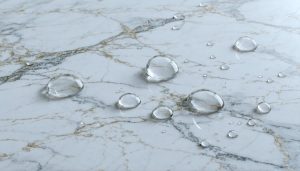
What are these rings on your marble countertop for instance? These rings are called etches and are common problem with regular use.
Etches diminish the natural beauty of the marble surface and reduce the appearance of your countertops; From certain lights and angles, these rings can be quite visible!
First, what are etches?
Etch marks look like rings or watermarks on our marble countertop. The first thing you should know is: Etches are not stains.
An etch is an actual changing of the natural stone itself. It’s not a discolouration; but a dulling of the marble’s surface. This is why it often appears lighter than the natural stone’s colour and can be become quite visible marks over time.
Etches differs from stains in this way, as you usually only notice the when the light is right, or when viewing from a certain angle. Learn the difference between an etch and a stain here.
Why do etches occur?
Marble is a very delicate and soft stone. It’s part of what makes it so beautiful wherever where it is in your home!
But it is because it’s delicate, that it’s prone to etching. This is mainly because of its calcium carbonate makeup. Acid reacts with calcium carbonate and eats away a tiny bit of the stone’s surface, creating etch marks.

Any splash of lemon juice, any drippy jar of tomato sauce, can cause a subtle etch mark on your polished marble countertop.
Etch marks can appear a mere seconds after spilling! That’s how delicate the surface is.
The more exposure your countertop has to these types of liquids, the more likely you are to notice etching, marks that can become more pronounced with time and without the proper stone care.
Other household liquids that cause marble etching:
Bleach, citrus, citrus-based products, alcohol and alcohol-based products, sodas, ink, rust, urine, and more.
Removing etch marks
At the Marble Clinic, we understand accidents happen and that there’s a bit of a learning curve when it comes to caring for your natural stone surfaces.
That’s why we’ve put together a series of Step-By-Step Guides to help you learn tips and tricks for restoring, cleaning and maintaining the natural beauty of your stone.
The following is a Step-by-Step Guide For Removing Etching from your marble countertops.
Step One: Clean Marble Surface
If your marble is in fact etched (not stained) then the first thing to do is clean the marble surface before treating to remove any dust, crumbs or debris from the marble surface.
We recommend using the R-311 Countertop Cleaner for cleaning, as well as for regular maintenance of your stone.
This stone countertop solution cleans, polishes and protects all-in-one, and is safe to use on all natural stone surfaces: Granite, Limestone, and more.

Step Two: Treat Your Marble
Treating etch marks on marble countertops is a craft!
We’ve made learning the craft easy with our Marble Repair Kit. This do-it-yourself kit comes with everything you need to remove marble etching in a simple 3-step process.
With just a few sheets of paper towel, a cup of water and about 15 minutes of labour you can restore the look of you marble countertop! Learn more about Marble Refinishing Kit here.

Step Three: Rinse & Repeat
Clean the marble surface again after treatment.
Make sure to clean the marble surface more regularly in the days to follow. If you still notice etching after some time, try repeating these steps again. If the problem continues, then it might be time to call the experts!
Best Practises to Care for Your Stone
- Prevent marble etching by reducing contact of acidic or caustic liquids and cleaners with the marble surface. Treat you marble surface like you would a fine wood finish. Use coasters and cutting boards and respond quickly when accidents happen.
- Clean up spills immediately! Clean-, maintain- and polish- marble surfaces often. Use the R-311 Countertop Cleaner to clean up spills, and for regular cleaning and maintenance.
- Before attempting treatment, make sure the etch is not a stain. Important distinction as etches and stains get treated differently on marble surfaces. Learn the different treatments.
- Treat marble etching with the Marble Refinishing Kit. Simple DIY solution for removing rings, watermarks and small scratches from your marble surfaces. Works great for smaller surface area etches of 9 sq ft or less.
- When in doubt, call the experts! If you encounter stubborn etch marks or if they cover a large surface area (9 sq ft+), and you reside in the Greater Toronto Area, then call The Marble Clinic. We’re happy to set up a free consultation.